AircraftProfilePrints.com - Museum Quality Custom Airctaft Profile Prints
|
This model is awarded by Editor's Choice - Excellence Award!
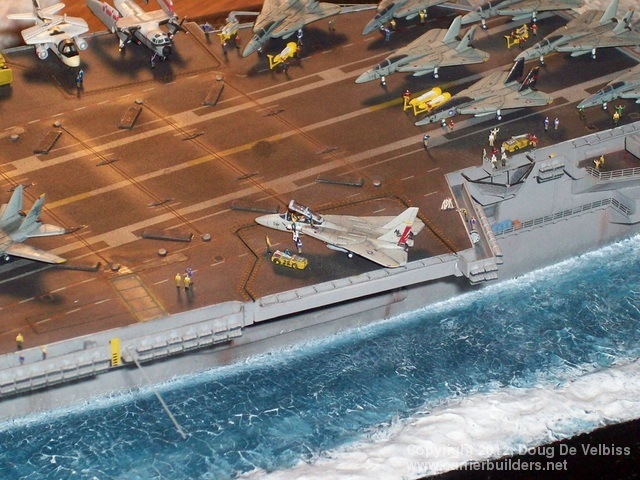
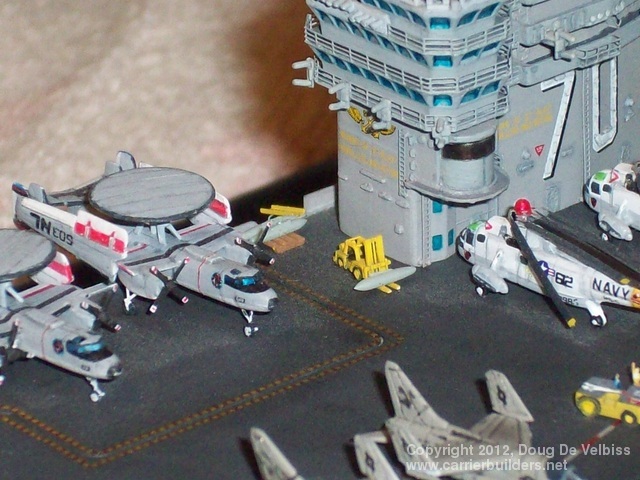
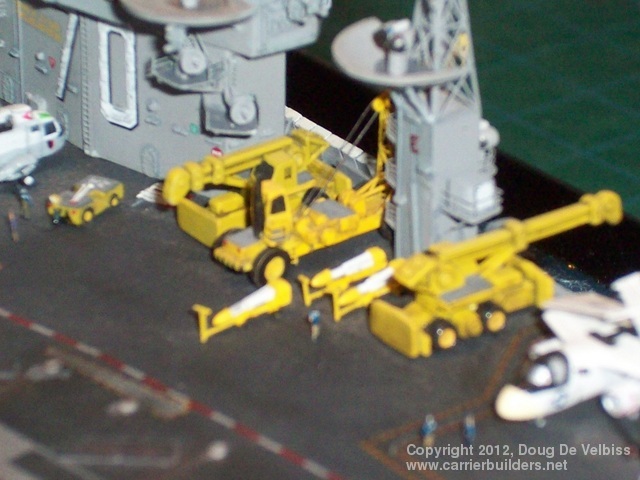
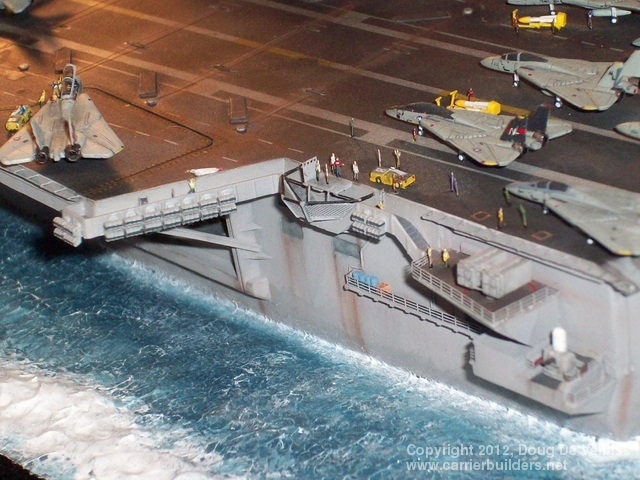
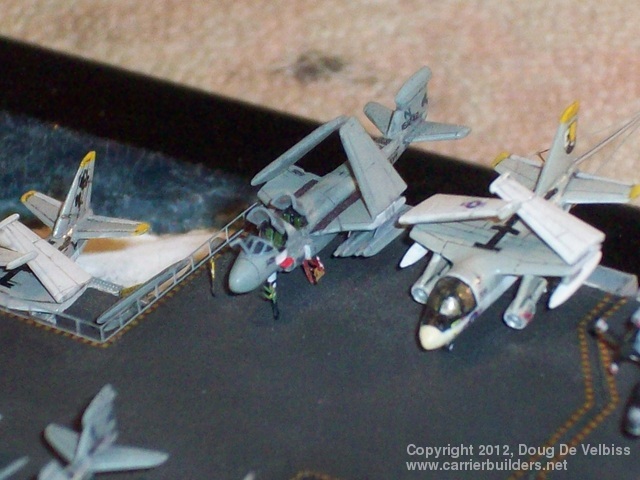
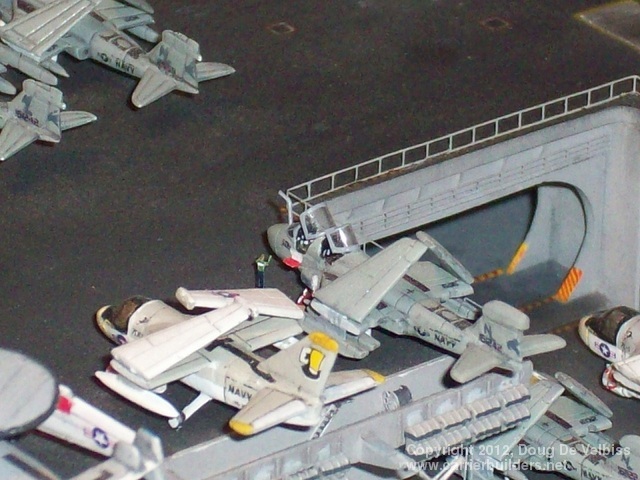
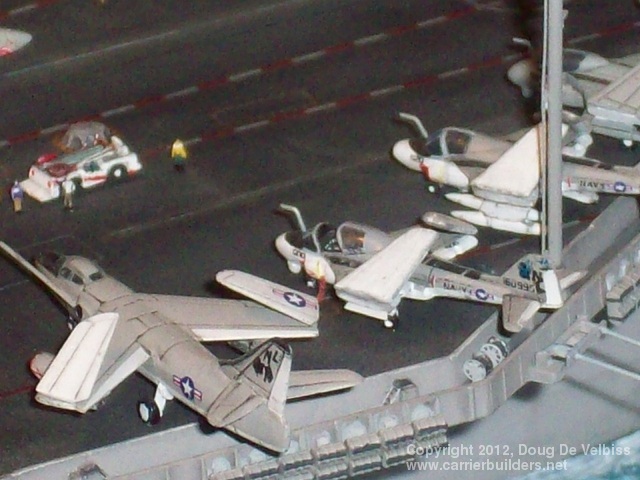
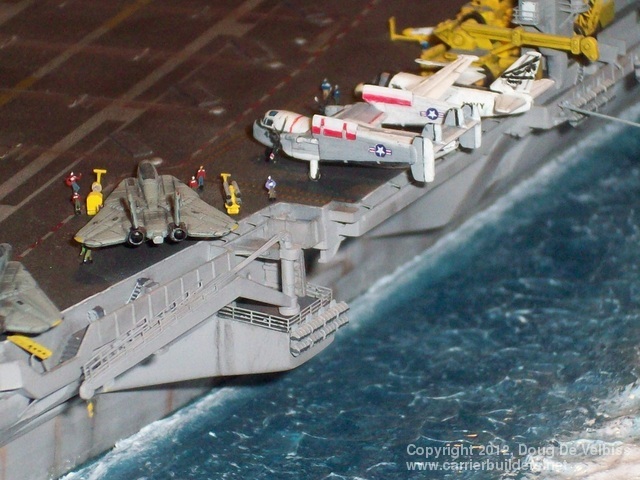
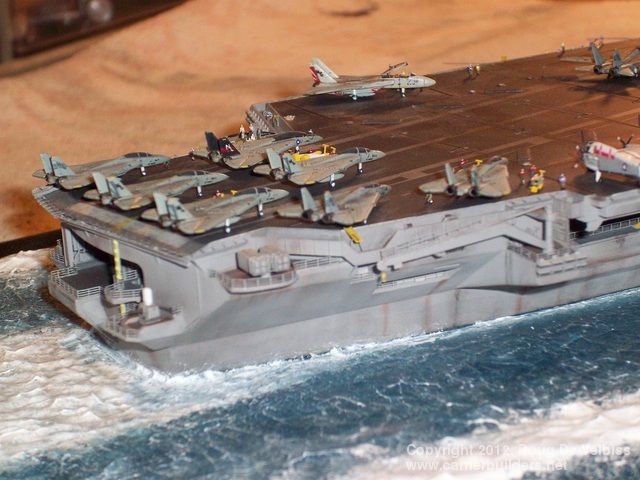
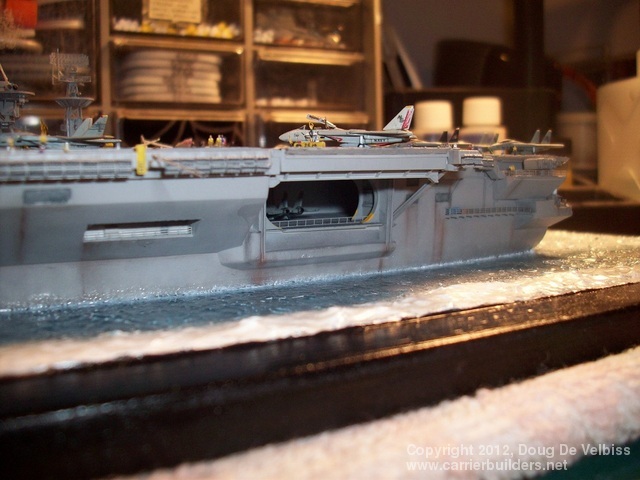
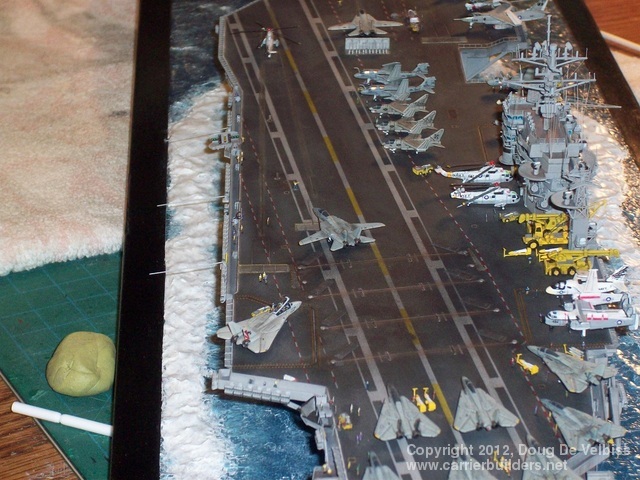
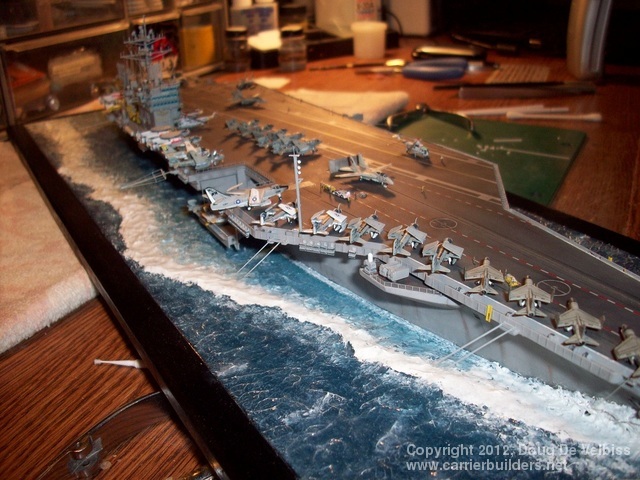
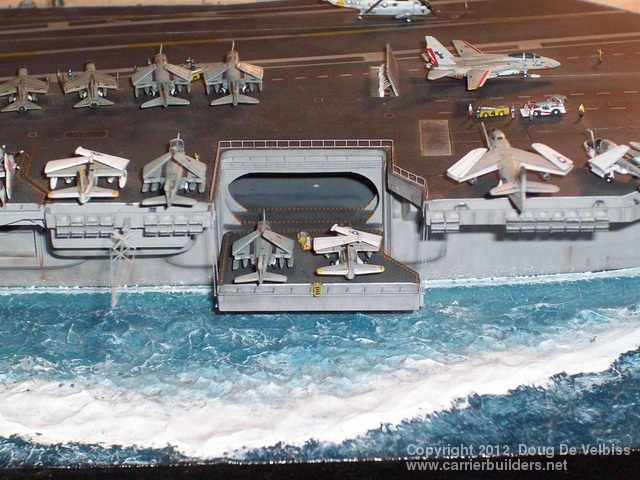
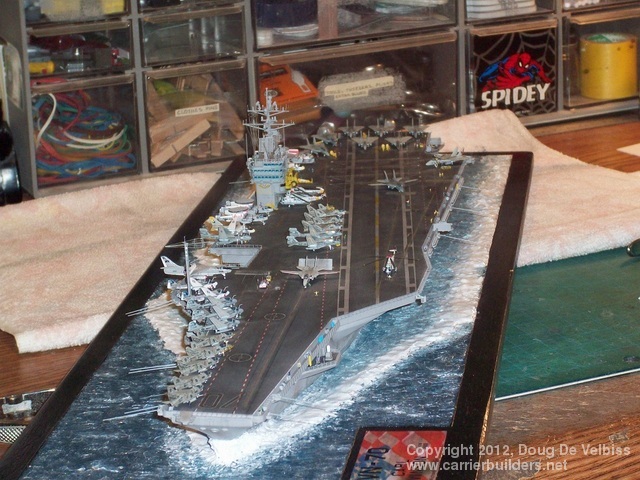
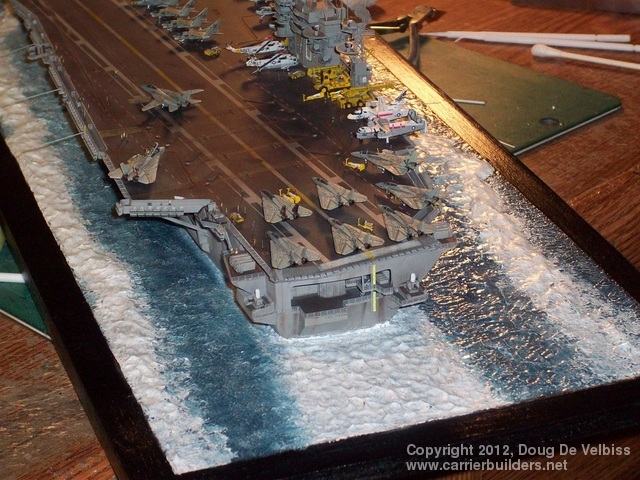
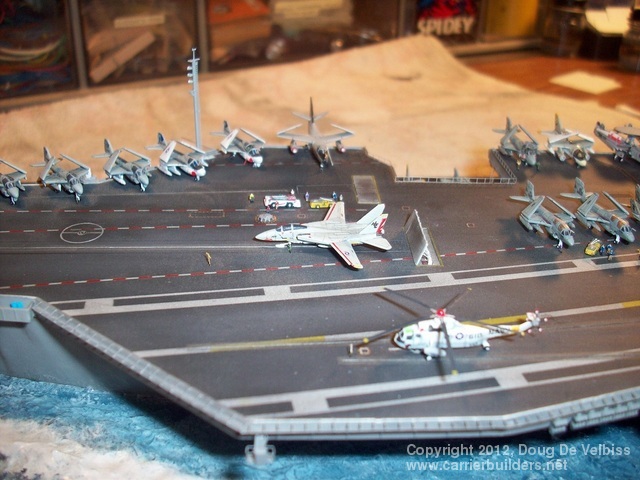
I started this as a gift for a co-worker who served aboard her from 1986 through 1988. He allowed me to utilize his two cruise books from this time period for reference material. I modified the kit to represent her fit for the 1988 time frame. In order to do that, a bit of scratch building went into this model. It has a complete hangar deck, although much of it can’t be seen after the upper deck was installed. Other scratch built items include the Tilly Crane, Belknap pole, forklift, weapons trolleys for the Phoenix, sparrow, and sidewinder missiles, oil drums and crates as well. I utilized several different decal sets in order to represent all of her markings. I was able to use some of the decals from Starfighter-Decals CVW-7 1982 air wing for some of the markings for CVW-15 which was embarked on her during this time. Also utilized were some of the markings from Pitroad. Any markings that I could not find were hand painted on the ship and air wing. The island was modified and appropriate radar added with corrected sponsons. A few of the aircraft were modified to include cockpits and open canopies. All exhausts and some intakes were drilled out to give a more realistic impression. Some have boarding ladders as well. The F-14 launching off the bow section was modified with extended flaps for its launch configuration. The fire truck that waits nearby was scratch built as well.
I used Tamiya paints for all the main painting for this model. Most of the deck lines were masked and airbrushed on rather than utilizing decals. The only decals used for the deck were the elevator outlines. The deck was completely sanded down first to remove the molded on deck lines. It was a bit of a task but well worth the result in the end. As far as weathering goes, I used pastel chalks and oil paints for washes and fading. I probably could have weathered the deck a bit heavier but it still turned out decent. The same materials were applied to the sides of the ship for rust and streaking effects. Once all weathering was completed, I sprayed its entirety with Testors flat coat. The flat coat will help bring everything together to a uniform look. However, the flat coat will also go a long way in removing a lot of the weathered look you put into it. It seems to tone it down after its applied.
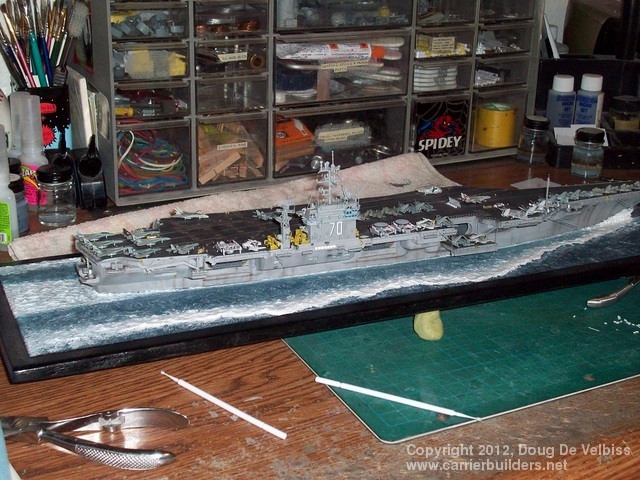
The base was a pre-cut piece of bass wood which was painted a deep ocean blue. I attached the ship to it and used Liquitex Gloss Gel medium to build up the bow wave, wakes, and ocean effects. I then began using darker and lighter blues and mixing in some greens and whites to achieve the effect you see. The bow waves and wake were then topped with titanium white to represent the foam. Once everything had dried, I then added several coats of future floor wax for depth. I then painted the exterior trim around the ocean gloss black.
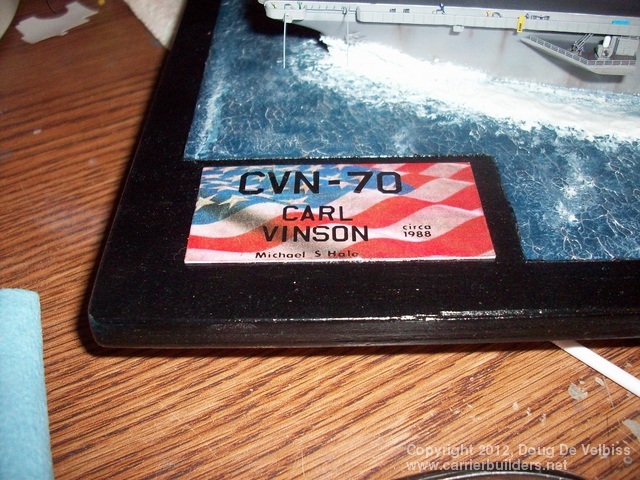
I added the nameplate using some plastic card stock and added the American flag backdrop. The lettering is dry transfer and added by hand. The ship took about a year to build due to on-again, off-again work and had to move homes in the middle of the process. I think overall it turned out well considering its scale of 1/720 and I had fun doing it. I hope you enjoy the photos.
Photos and text © 2012 by Doug De Velbiss October 29, 2012 |