AircraftProfilePrints.com - Museum Quality Custom Airctaft Profile Prints
|
This model is awarded by Editor's Choice - Excellence Award!
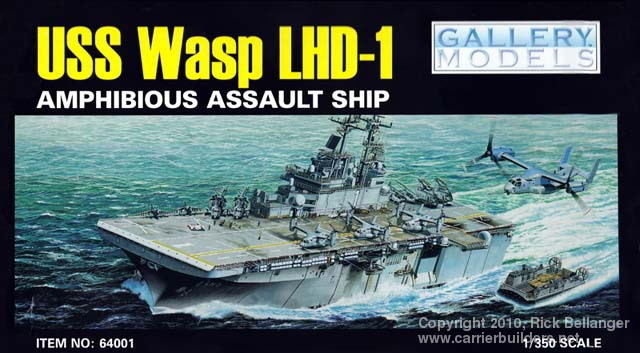
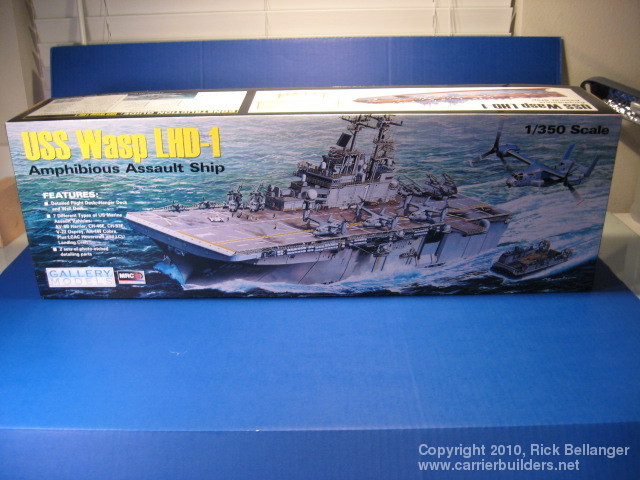
At the IPMS Nationals this summer I had the opportunity to see the latest and greatest of MRC's products. Being a New Comer on the Block, Gallery Models showed us their intended release of a USS Wasp Class ship. Never done in 1/350th scale, this has always been one of my favorite ship types and just had to have one. I was given the pleasure of doing the review sample provided from MRC/ Gallery Models for IPMS/USA so my dreams have been answered. I received the kit just after the Christmas Holidays and dove right into it.
Aircraft
USMC Assault Vehicles
Assault Boats
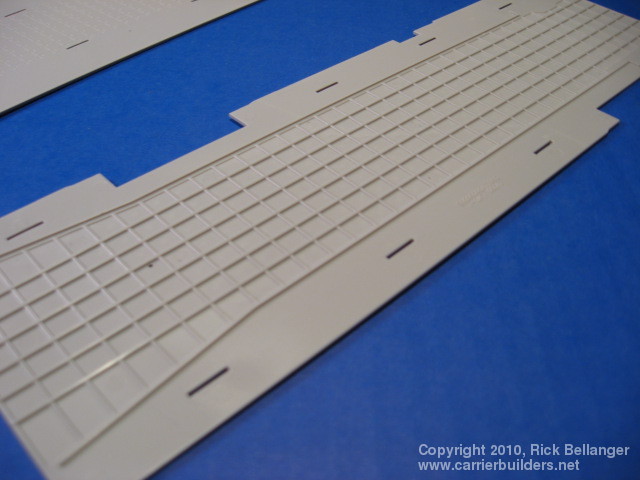
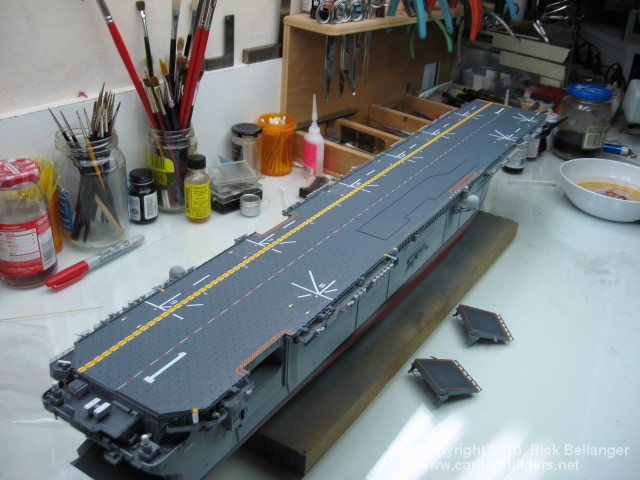
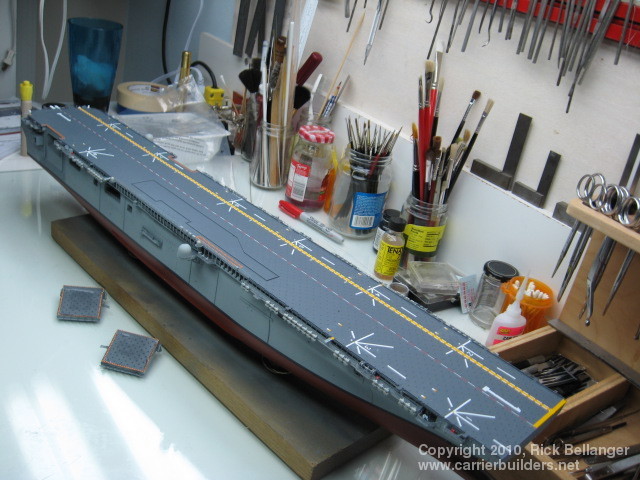
Flight Deck
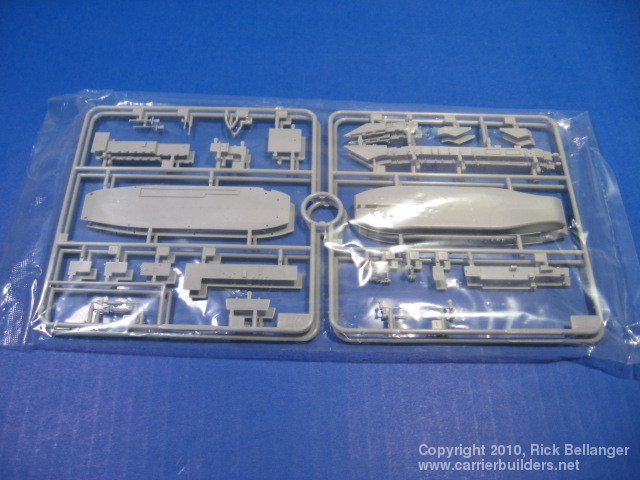
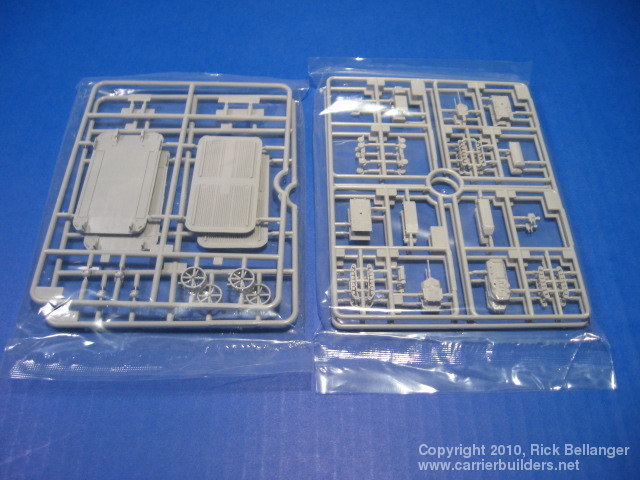
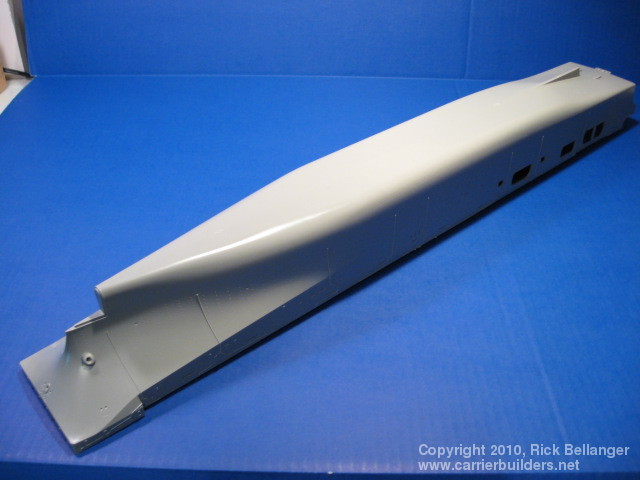
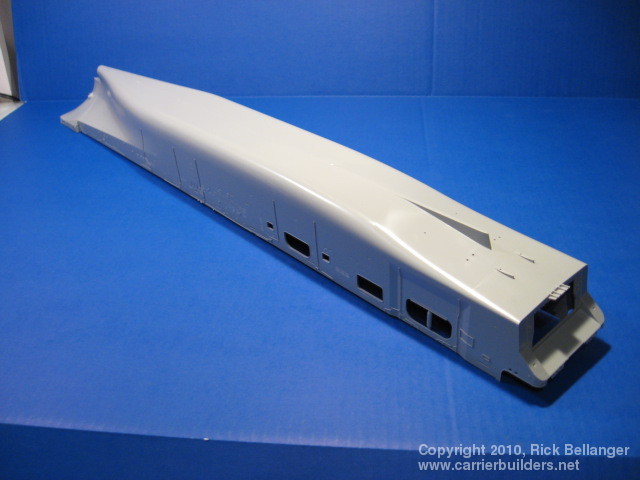
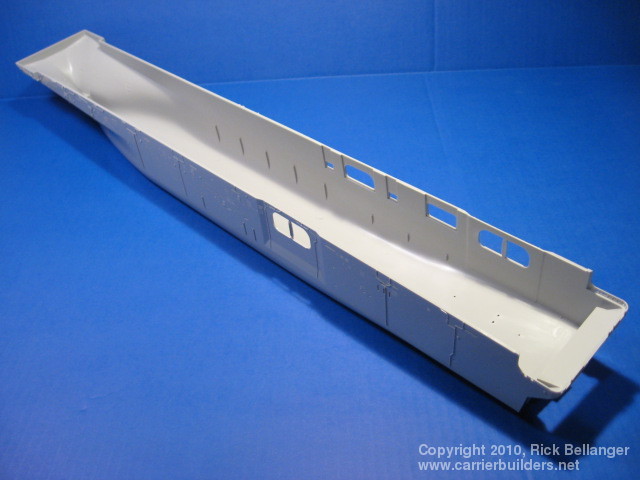
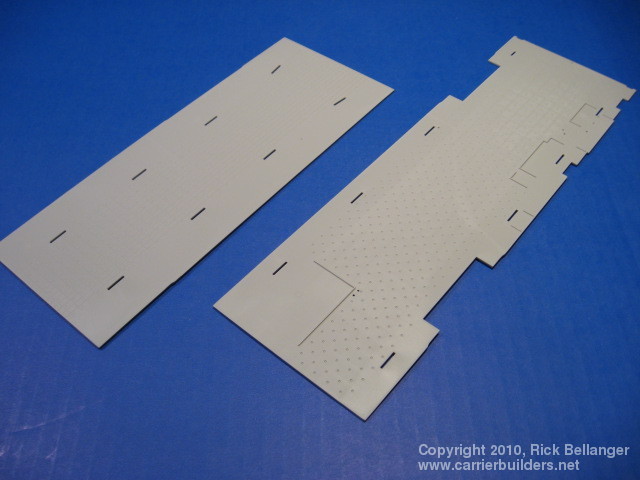
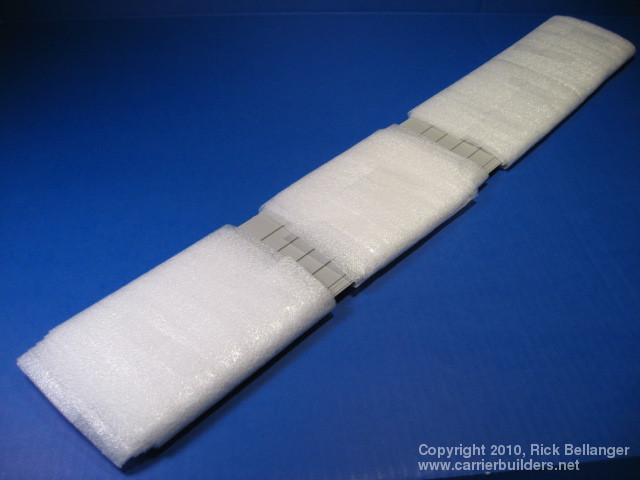
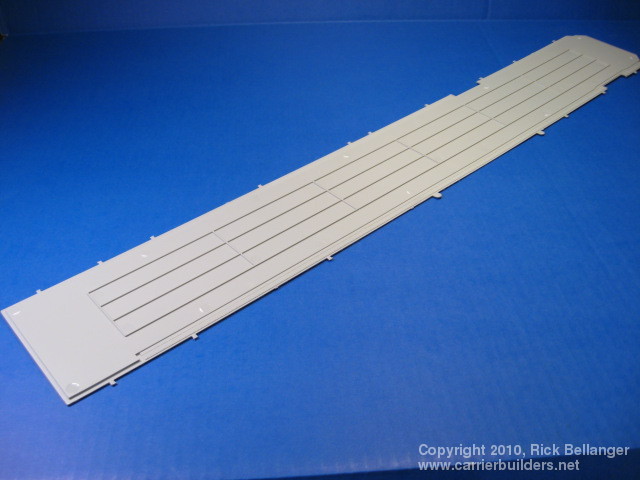
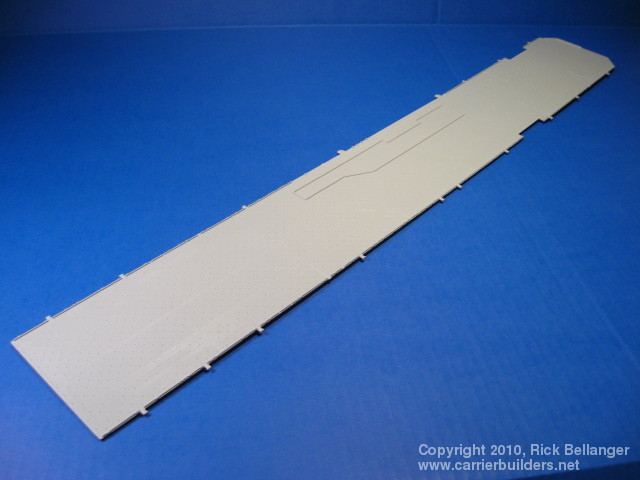
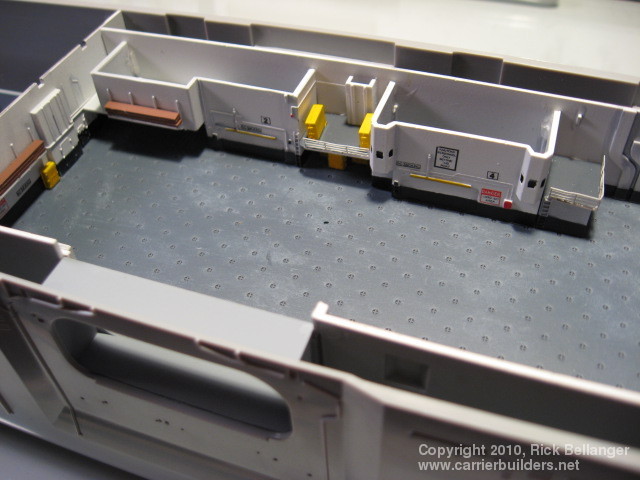
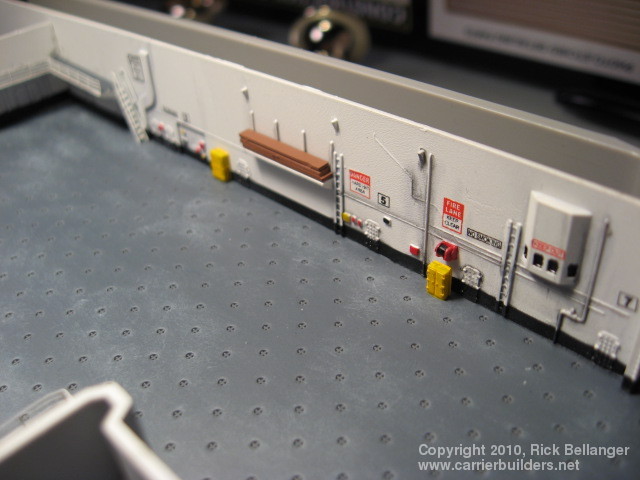
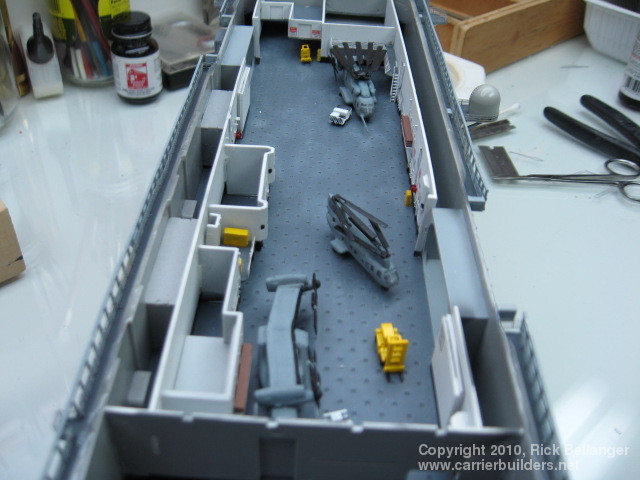
The model comes packed in a large sturdy box, with each part tree enclosed in a sealed plastic bag. It includes cardboard inserts for protecting the large parts and small boxes for the small stuff. Decals were well protected, wrapped with plastic and a cover sheet. Nothing was damaged or warped. One thing I will have to say. You can definitely tell where this kit came from. If I didn't see the MRC/ Gallery Models Logo on the box cover I would have said Trumpeter all the way. The way the model is packaged, Trumpeter. The way the sprues are laid out, Trumpeter. The design of the kit and the instruction sheet, again Trumpeter. The painting diagram, yep Trumpeter. Nothing against Trumpeter, I love their ship models, some of the best I have built, especially their Carriers, so you know what you're getting into before you start. The hull is a one piece affair (which I love) with the exception of the Bulbous nose. So there are no major seams to fill. It measures out just under 29" long and 4" wide. It is a full hull ship model so if you want to do a waterline version you will have to do some surgery. No engraving is done on the hull to indicate where the waterline is, so you will have to guesstimate on its location. The Painting and Marking guide provided with the model is adequate for this. So be prepared, it is a large model. The flight deck is a single piece casting (got to love it, no seam to join and fill) with underside detail (we call that the overhead in the Navy). The molded tie downs are grossly oversize but it's something you will have to deal with. I left them alone and with a coat of paint they are not so noticeable. The flight deck is also inscribed with the locations for the deck markings. Sometimes good, sometimes bad. They are a great reference for the placement of the flight deck decals and there are a lot of them. I left the engravings on and when the decals are placed they kind of blend in and hide. The well deck consists of multiple pieces. You get a "Wet" deck, a ramp deck and an upper storage deck plus all bulkheads and overhead. All include appropriate surface detail, again oversized but with a coat of paint not too bad. Beside once the model is assemble you will not be able to see much of it anyway. The Hanger bay is a complete bay with deck, bulkheads and overhead. The bulkhead detail is accurate and very well done with lots of goodies to make it look busy. The deck has the molded in tie downs so again a coat of paint tones them down.
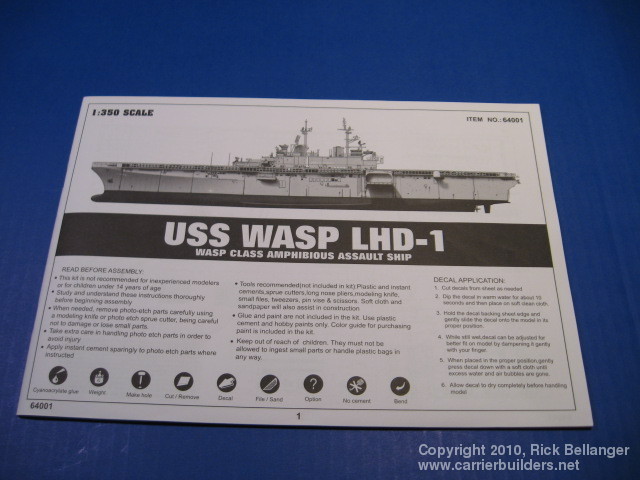
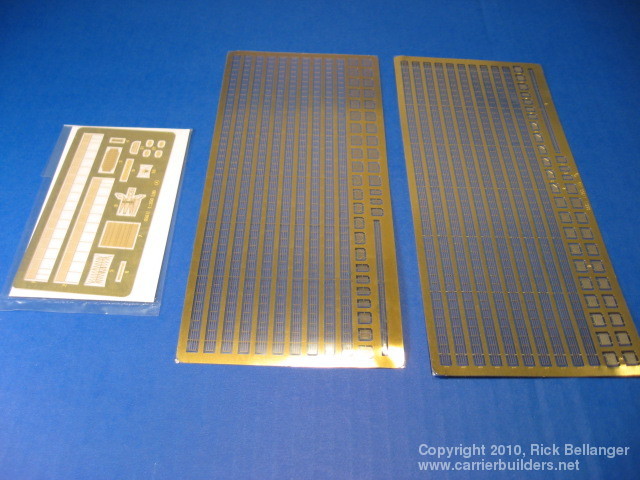
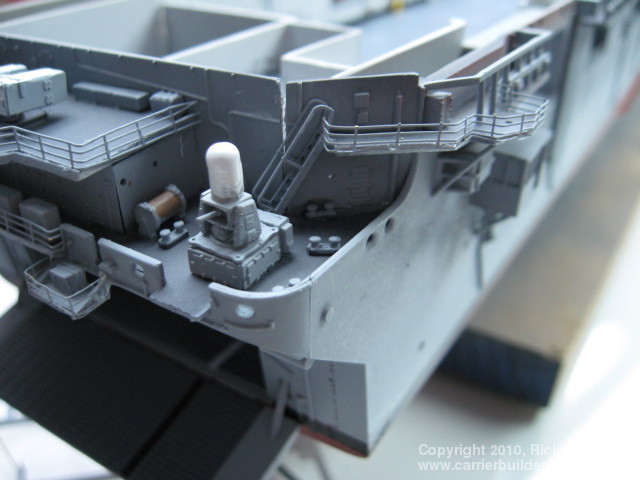
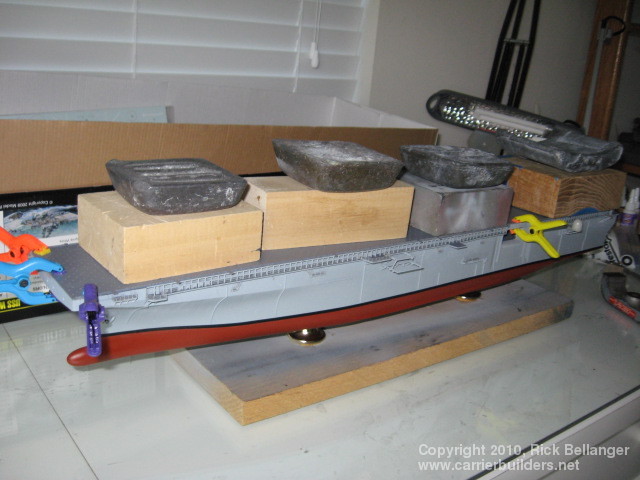
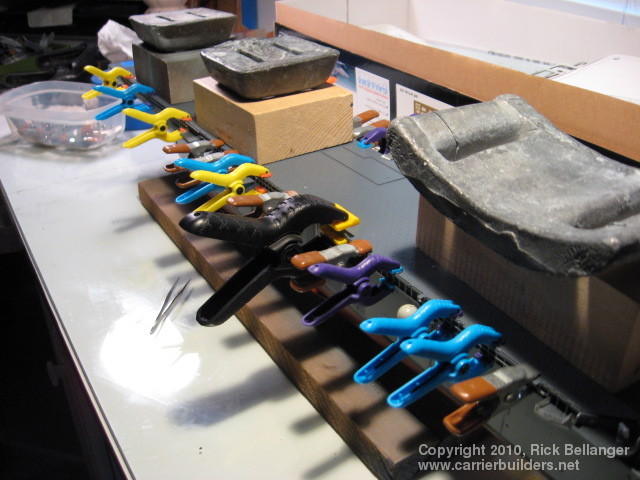
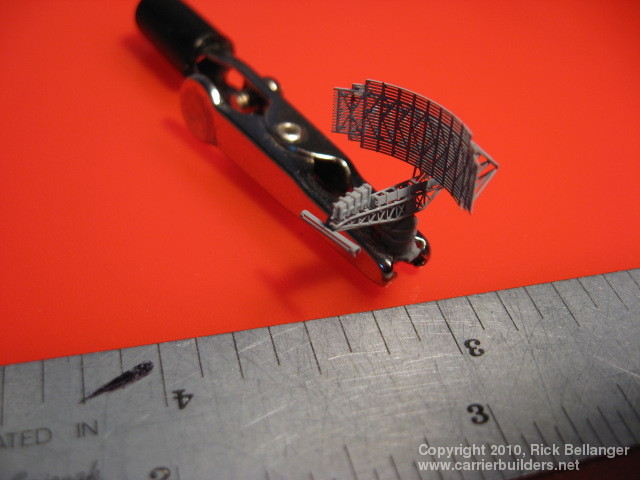
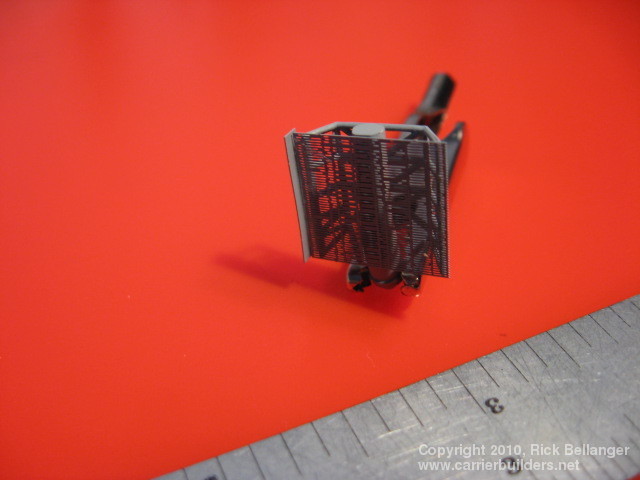
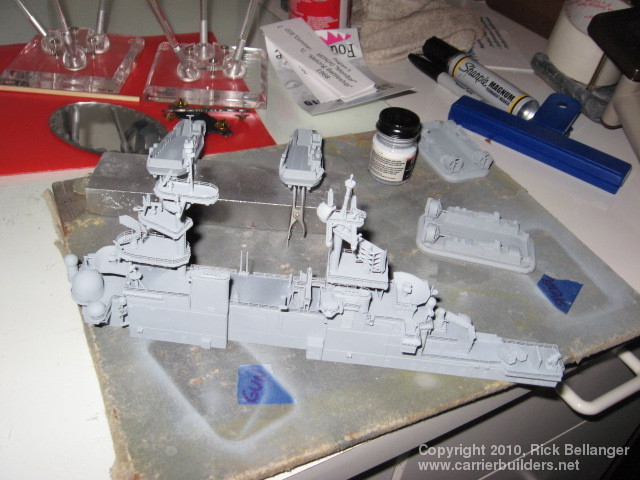
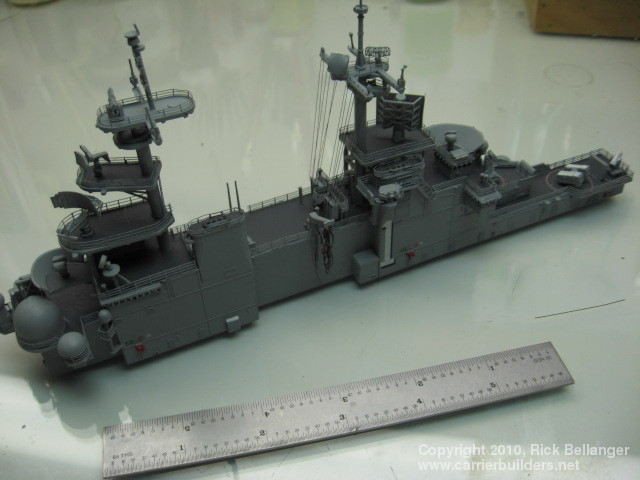
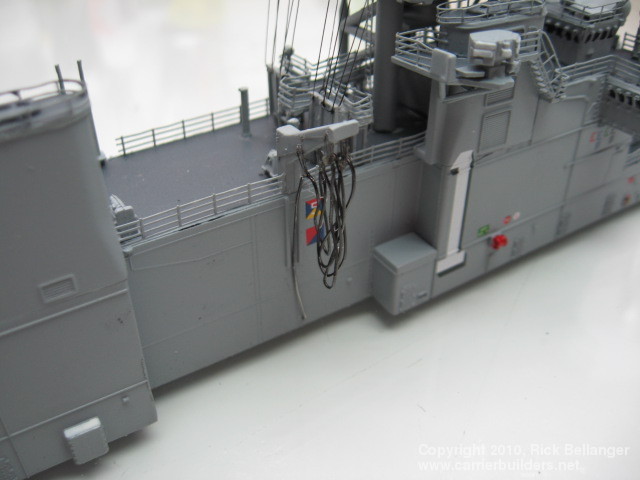
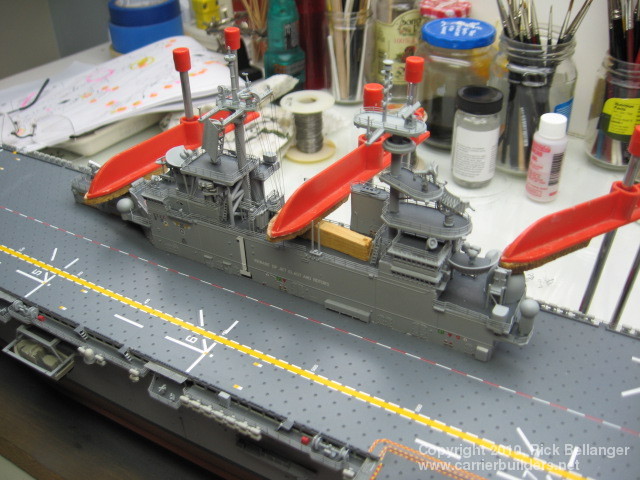
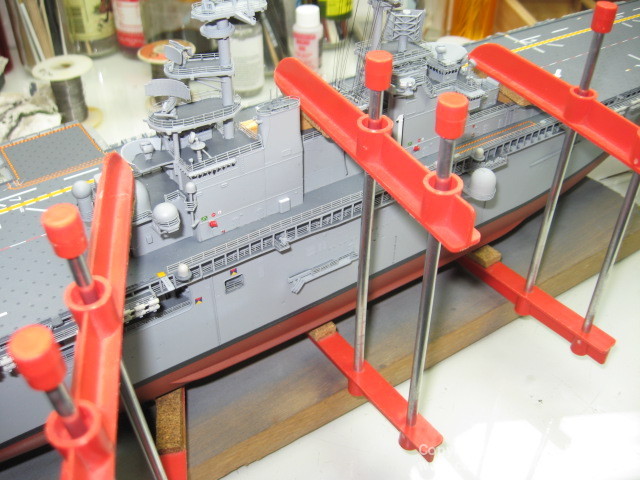
The instruction sheet is a 36 page easy to follow booklet. The diagrams are adequate for the placement of parts and include color callouts for various detail parts. Some of the locations for small parts are a little questionable especially when it comes to the outside catwalks and walkways. The assembly follows a logical order and I did not deviate too much from it. I left off small parts that I know I would break or damage until the final assembly. A full color double-sided poster showing the painting steps for the Wasp and all the on-board craft are included. Mr. Hobby, Vallejo, Model Master, Tamiya and Humbrol colors are shown on a paint reference chart. Some of the camouflage choices for the USMC vehicles are questionable, and the modeler should research appropriate schemes for the vehicles and time period being modeled. Now would be a good time to plan how you will display your model. You can use the base provided in the kit or mount it on a nice display board. I chose the latter. I use imitation brass pedestals I get at my local trophy shop. They are called bells and cost $.25 each. They accept a 1/4 x 20 bolt through them. I locate where to place the pedestals on the hull then drill appropriate holes. Then glue in a nut to match the bolt size, making sure it is never going anyplace. I use a temporary wooden base during construction which aids in assembly immensely. It gives me something solid to hold on while I work, without damaging the ship. Once the model is far enough along I'll exchange the temp base with a permanent base. I would highly suggest that you prepaint the hull haze grey at this time. I added the bilge keel , the bulbous nose and the elevator guides before painting. A little filler and sanding on some seems needed to be done. I also painted the bottom and the waterline. I used Oxide Brown Primer out of a rattle can bought at my local get anything and everything store. The water line is black decal cut into strips the appropriate width. You start with the Well Deck. You will have to prepaint everything because once it is in place you will not be able to get to anything. Proper planning is a must on this model. I followed the colors called out in the instructions. Deck is gunship grey, bulkheads haze grey and overheads white. Detail colors as stated in the instruction sheet. I did add photo etch handrails to the walkways on both sides of the wet deck bulkheads. The well deck and equipment deck are placed inside the hull and if you want to add any additional details do so now. If or when I do another one of these ships, I would definitely consider placing lights to illuminate the interior. There is plenty of room for the wires and such and with the pedestals I use, it would make running the wires easy. It's a shame that all the detail inside the well deck, equipment deck and hanger bay is very hard to see without light. Next comes the hanger bay. Deck is gunship grey with the overhead and bulkheads white. Detail colors as called out. I used reference photos to further detail and paint extras. I also used extra photo etch for ladders and handrails as needed. I added the Aircraft and other deck equipment at this time to fill the bay. All the aircraft had to have they're wings, rotors and tails folded in order to fit. So there is one each of the Osprey, Sea Knight and Sea Stallion in the Hanger Bay. Let's talk about the photo etch provided in the kit. What is included is minimal and far from being complete. You get one size of handrails for the whole ship. These are great for areas that require these massive rails but for other areas you will need to come up with something else. I am fortunate enough to have a lot of spare photo etch from other models so I had an assortment to choose from. It is ironic that the best photo etch and detail set I could find came from Gold Medal Models, Admiral Kuznetsov, a Russian Aircraft Carrier set. It provided most of the different size handrails and ladders that I needed. The radar and electronic gear photo etch from the kit will work but is still a little oversized. The stern section is next. A lot of goodies go back here. A couple of Phalanx, a Sea Sparrow launcher and a RAM launcher. Plus all the fiddly parts to make a ship run. The stern gate and doors are included. Prepaint before you assemble. The catwalks and walkways are your next step. I added all the small parts and painted everything. I did leave the elevators and small boat off until final assembly. In step 26 and 27, you add the stanchions that support the flight deck, catwalks and walkways. The instructions are a little fuzzy on how to do this but after looking at various photos and studying the diagrams I think I figured it out. On the real ship the inside of the stanchions have handrails. So I used the oversized rails provided in the kit for these. Go slow and take your time and make sure everything lines up. This is a critical step because everything has to match up with the flight deck for a smooth finish. The flight deck is added next. I prepainted the bottom white as this is the overhead for the hanger bay too. I also painted the deck gunship grey. Gluing this deck to the hull took 2 tries. The first I did not match the stanchions up as I stated in the previous paragraph. I could not get the deck to lay flat. After some skillful bending here and there I final got things to match up and the deck went down without a problem. I did use a few clamps and weights to make sure things were even and tight. Step 29 and 30 you place these catwalks and walkways in place. Hopefully everything matched up with the previous steps. These go in the middle of the stanchions and are very fragile. Putting on the life raft and holders, handrails, ladders and steps help a lot. I still banged them up and bent them constantly. So they are not the straightest rails around. You will also attach a lot of detail parts which helps out too. By now the main hull is pretty well competed. All you have to do is add the photo etch netting along the flight deck and elevators. These are a joke in my opinion and the weakest part of the kit. As soon as some aftermarket ones become available I will get rid of these and add the aftermarket ones on. I attached the hull to its base at this time. I used an Oak board 36" x 8" x 3/4", routered all its edges as needed. Drilled the appropriate holes for the mounting screws. Stained the wood an Antique Oak finished and used a Satin Poly Finish for the final base coat. A couple of felt tabs on the bottom for ease in movement. The Island is next and is 7 steps plus sub assemblies. Again plan your steps and remember to build from the bottom up and the inside to the outside. Prepainting the assembly before you add the details will help a lot. Especially in the area of decks and windows. I wish I would have painted the windows before adding the details. Live and learn. A whole bunch of handrails and ladders go on the Island so be prepared. Good reference material is a MUST for this project. One suggestion is to drill tiny holes in the yardarms and the signal flag boxes where the signal flag halyards go before attaching them to the mast. Another lesson learned. The photo etch radars and other electronic stuff provided in the kit are ok, better than the plastic pieces but still leave a lot to be desired. Again they will be changed out when an After Market photo etch set becomes available. Once all this is done it's time to glue everything together. I attached the Island using Testors glue in the black bottle to give me time to work with it. I used several clamps to hold it tightly in place and let it dry overnight. The diagrams and drawings for installing the hand rails and netting are good. Since you are given only one type of rail you can't go wrong. The supply is adequate but still be frugal. The rails were not made for a specific spot therefore they are generic and each one will require a custom fit. The stanchions will not line up with corners so take your time and good luck. Prepaint all the photo etch before attaching them.
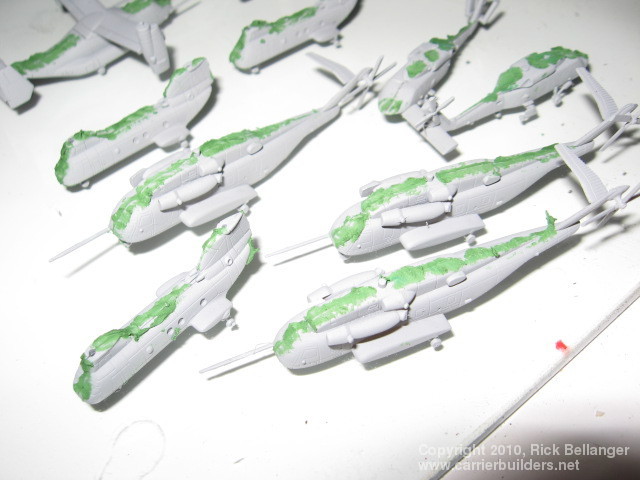
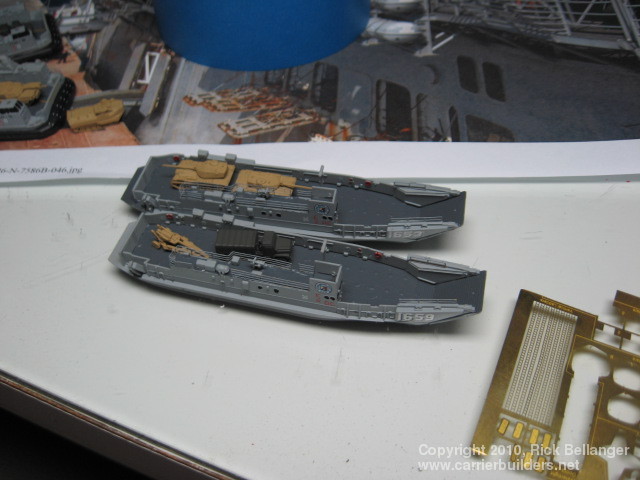
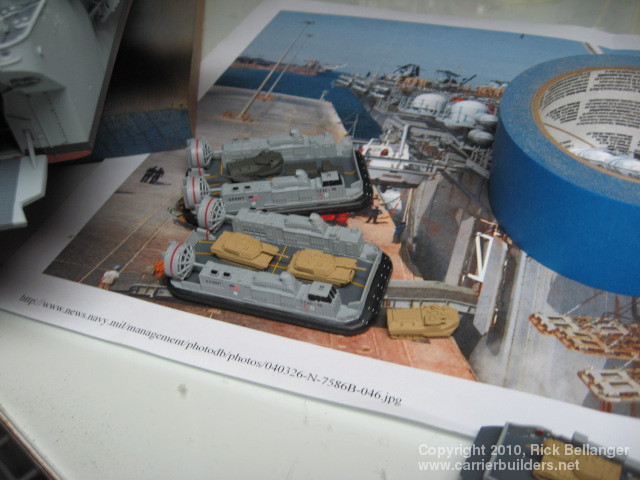
About 25% of the build time went into the hull. Another 25% went into the Island The rest went into the Aircraft, Boats and other gear. Painting the deck equipment was a chore. There are so many different ways to paint them again I used photos from my references to go by. The Salvage Crane was detailed using left over hand rails and fly fishing line for the wire rigging. You get enough parts to build two but only enough wheels to do one. Only one is required for the ship. The Assault Vehicles are next on the list. I built mine in between different steps while I was waiting for something to dry. They all go together nicely and make up some very nice models in themselves. They would make an interesting diorama just using them. I painted mine in Desert and NATO schemes, just to add a little color. The boats are next. Beautiful models. The LCAC's and LCU's are very nicely done. The go together easily and look great. I used some hand rails here and there to finish them off. Again you could enter these as an individual model in any contest. It's a shame that sticking them in the well deck would hide them. I filled them up with the Vehicles as photos show the loaded. I did use some left over decals from other ship models to give them some color and a little life. I just wish you were given the option and parts to do an LCAC in the sitting position without the bladders inflated. The Aircraft came next. Again a Trumpeter thing, you get them in clear plastic. This makes it really hard to find and fill seams. They will require it. They did not go together smoothly and required filler and sanding. So I lost the nice clear effect of the clear plastic. I ended up painting the canopies a dark blue. The detail is pretty good and you do get a different variety of aircraft then normally found on other ship models. You are given the option of folded or extended rotor blades for the helicopters and props for the Osprey's. No instructions are given for folding the tails on the SH-60's or the CH-53"s or the wings and tail on the Osprey. If you are going to put these in the hanger bay you will have to make the modifications yourself. All the rotor and propeller blades are a little thick and will be replaced when a photo etch set becomes available. A couple of other details for example winches, fuel tanks and pylons will be added later to the Aircraft. I assembled, primed and puttied the aircraft. Then sanded and reprimed as needed. After this was completed I painted them their appropriate colors. I chose a couple of different schemes to give a variety of color on the flight deck. I left off the rotors and propellers until the final painting, decaling and assembly was completed. I then dipped them in Future to get a glossy finish for the placement of the decals. With decaling completed the aircraft were airbrushed with Testors Dull Coat to remove the gloss and flatten the finish. Then I painted the canopies finishing the aircraft. All weathering on the USS Wasp, it's small boats and aircraft was done with oil washes and drybrushing. It was given a final coat of Scale Coat II flat finish to protect everything. I like Scale Coat II flat finish because it gives one of the dullest finishes out there.
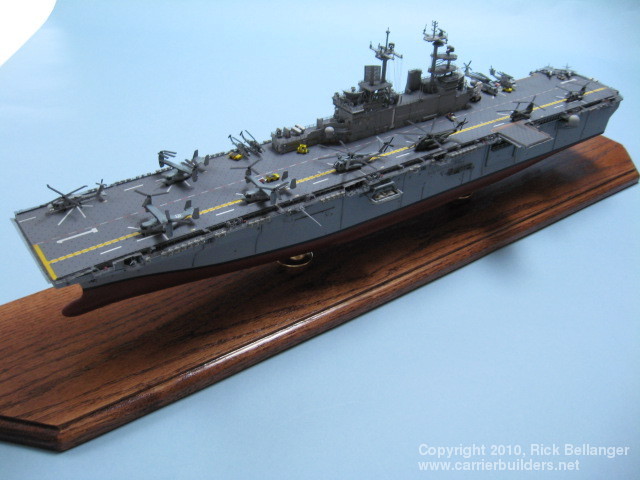
After all is done, this has got to be one of the NICEST and most enjoyable model ships I have ever built. I am very impressed with the detail and accessories that Gallery Models has provided in this kit. A word of advice, PROPER PLANNING. Read and study the instructions. Plan your assembly and painting to work together. There are a few short comings with the model. But nothing that other ship models don't have or include. A photo etch detail set made for this model would be number one on my wish list. The photo etch that is provided in the kit is ok but leaves a lot to be desired. I also wish they would have included a model of the UH-1N Huey instead of the SH-60's. The Marines don't fly the Sea Hawk they fly the Huey. Finally I would have loved to see them include a choice for the air cushion bladder on the LCAC's, deflated and inflated. Another wish is for more aircraft. I would like to increase the flight deck capacity to include a lot more aircraft. Maybe they will eventually sell them as an addition like Trumpeter sells theirs The decals are great. You get just about everything you will need. They lay down flat and gave me very little problem with their application. I used Solvaset as a final setting solution without any problems. Beyond all that, this model of the USS Wasp will make a great addition to any Gator Navy Fleet or Carrier Fleet. It's up to date and still out there floating around. I would Highly Recommend this superb kit to a modeler with some ship building skills, due to immense complexity of parts, sub assemblies and working with photo etch and fast acting glues. It should be available in all shops by this time. Thank you MRC/ Gallery Models for providing IPMS a pre-release for a review sample and Thank You, IPMS/USA for giving me the opportunity to build it for the review.
Photos and text © 2010 by Rick Bellanger June 16, 2010 |