AircraftProfilePrints.com - Museum Quality Custom Airctaft Profile Prints
|
This model is awarded by Editor's Choice - Excellence Award!
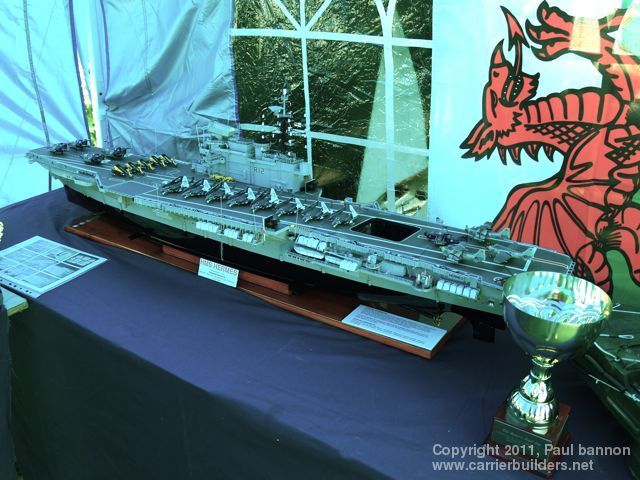
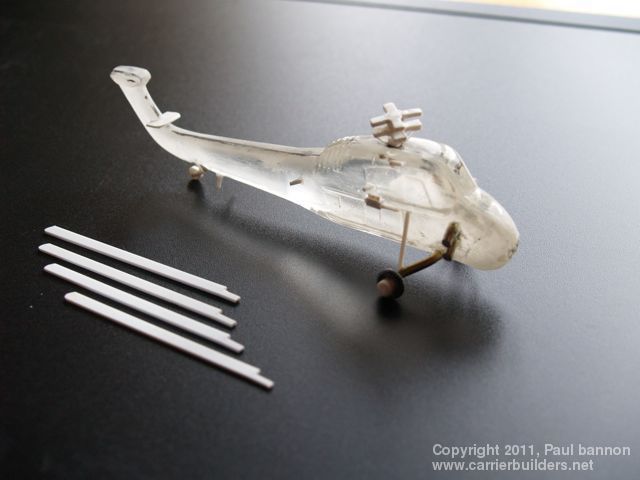
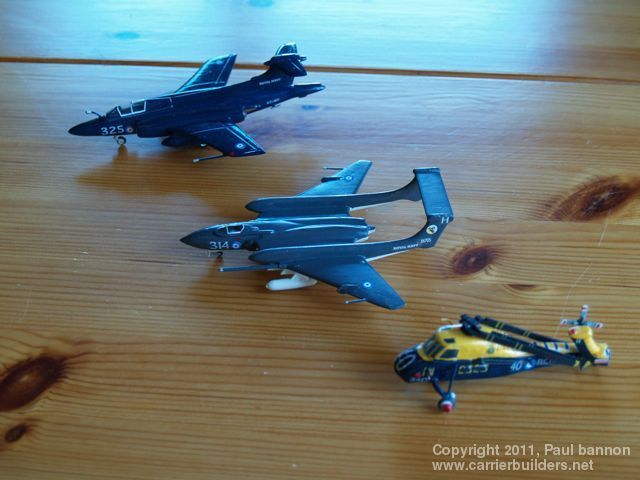
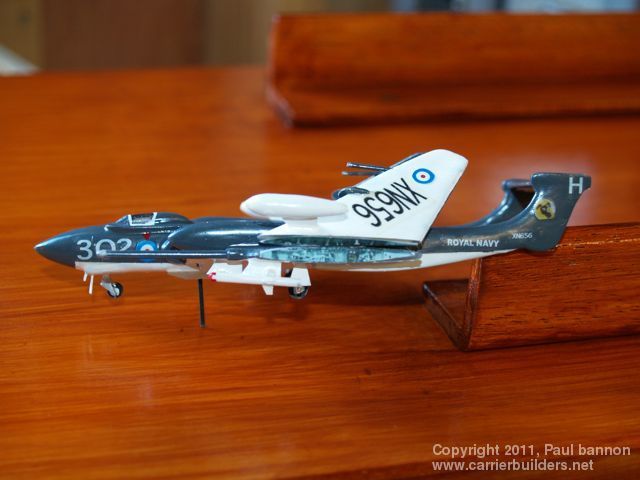
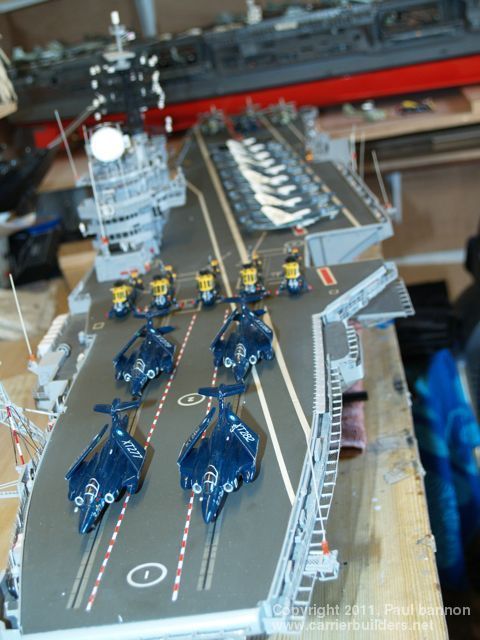
This is the part of the build that gives me the least pleasure but with only thirty aircraft in total I had little excuse not to make the effort required to complete it. Some may find the words Air ‘Group’ a little strange in todays American dominance of the carrier world. Although the Royal Navy appears to have adopted the Americanism - Air Wing - during the sixties the term was not in use. The term ‘Group’ was certainly more appropriate as although each carrier would have squadrons that would normally be embarked, it was not a rule. For example, the normal helicopter squadron for Hermes was 814 Navel Air Squadron (NAS) but during 66/67 the helicopter element was supplied by 826 NAS The Air Group consisted of six Buccaneers from 809 NAS, eleven Sea Vixen Mk2 from 892 NAS, six Wessex HS1 from 826 NAS and five Gannets from 849 NAS. four being Airborne Early Warning (AEW) type and one Courier. Ships Flight consisted of two Whirwind Mk9 helicopters. The easy way would have been to buy kits but unfortunately only the Buccaneer and AEW Gannets could be sourced at the correct scale from Welsh Models, these were duly bought and constructed. The others would have to be constructed from scratch - I decided to cast them, with no previous experience of this method I had no idea of the results - as it turned out I think they are not to bad. The first job was to create the fuselage blanks. These were done in Balsa sheet. Two pieces were pinned together and carved to produce a basic fuselage. The pins were removed and I had a top half and a bottom half. The Sea Vixen also required the the two booms to be made in the same way. The helicopters were constructed in the same way but were two simple halves, each half was gloss painted to aid mould release..and then glued to a Styrene sheet and a box built around it. This was filled with two pack silicone rubber and allowed to set. Now came the first moment of truth, would the mould separate cleanly as I had been told it would by the suppliers of the casting rubber - it did - and I had a very pleasing mould. The next step was actual casting. The material was a slow curing clear twin pack resin that took 24 hours to reach de mould state - a long wait! Once again everything worked and I had a Vixen, Wessex and a Whirlwind from the first attempt. Each half required the joint surfaces to be sanded down as the finished item had a slight oval shape. The remainder of the aircraft became easier to do and the oval shape was reduced as my casting skill improved. The remainder of the aircraft build consisted of making pylons, drop tanks and undercarriage etc, painting and application of decals. The results you can see from the pictures One picture shows a peg protruding from under the fuselage, this is to attach the aircraft to the flight deck so as the boat can be sailed with aircraft on deck, although in true Royal Navy style, as many aircraft as possible are ‘struck down’ when not flying - makes for a very congested hanger. Squadron numbers for 809,826 and 849 NAS are accurate. 892 NAS is app 90% accurate with registration serials at about the same level
I would not build a hull from Fiberglas again. The system used made for easy construction but inconsistent lay up of the matt produced an equally inconsistent hull thickness which resulted in a heavy hull with far to little buoyancy. This has resulted in an unstable boat and has required the fitting of a removable keel to carry the required ballast weight. In truth, when fitted, it can hardly be seen but is something of a failure. As opposed to my Truman i have kept the working parts to a minimum and this greatly assisted with the build. I made the Lifts (elevators) operate in the same way as the Truman but may convert the centre line lift to rack and pinion to give more positive operation. Shortly after finishing the build I found a supplier of super small LED’s, 2mm x 1mm in various colours and decided to put in ‘runway lighting. The ‘wiring’ connecting the LED’s is sticky backed copper strip cut from one inch wide tape supplied to put around flower pots to prevent Slugs getting at the plants. It means you can construct your own printed circuit to which you can solder wires. A club member made me a digital board that creates the walking effect for the Centre Line Thats about it, I hope these small articles have been of use
Photos and text © 2011 by Paul bannon August 4, 2011 |